
How to Make DIY Mason Jar Christmas Decor at Home: Creative Crafts for the Holidays
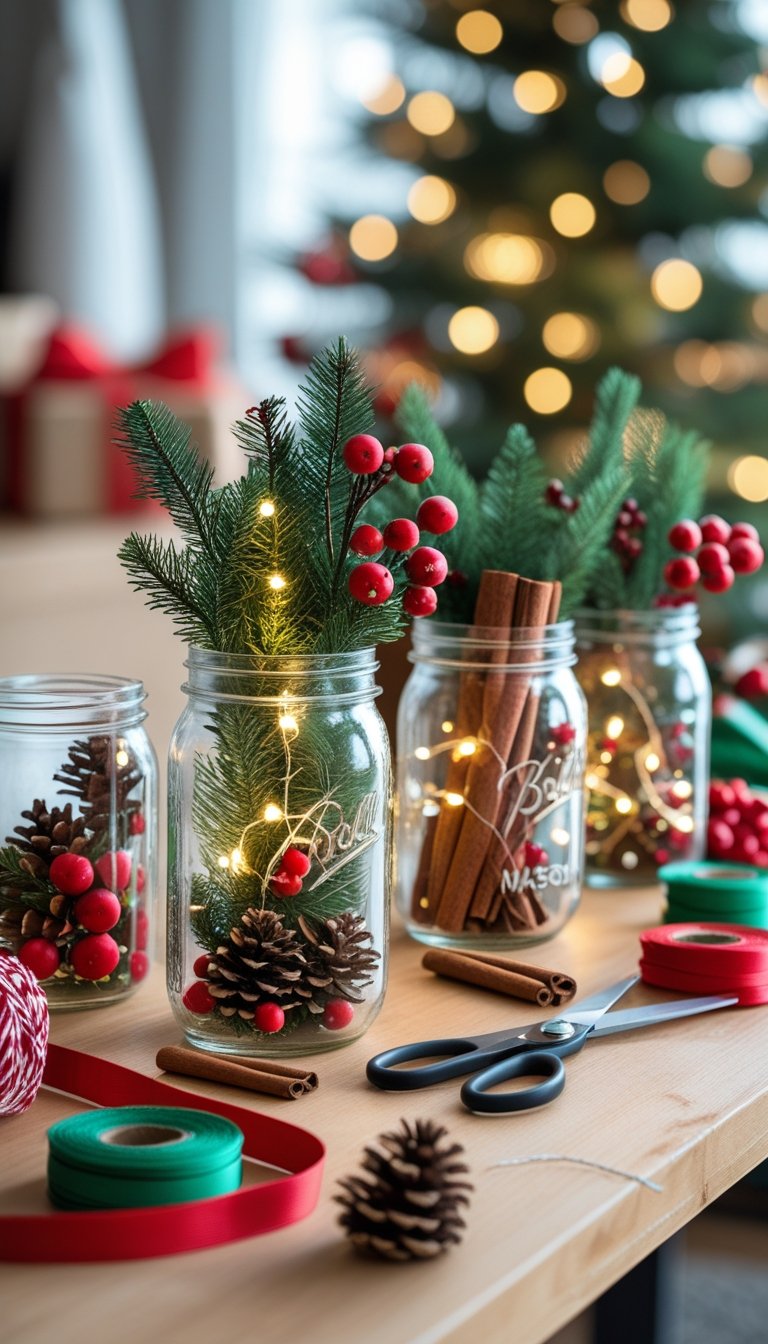
You can turn simple glass jars into festive Christmas decor with basic supplies like paint, ribbon, greenery, candles, and small holiday figures. To make DIY Mason jar Christmas decor at home, you clean the jars, add paint or fillers, decorate the outside, and style them with lights, candles, or seasonal accents. With a few easy steps, you create pieces that fit your space and budget.
Start by choosing the right jars and craft tools so your projects last through the season. From there, you can make classic painted jars, glowing lanterns, snow globes, and fun characters like snowmen or Santa. You can also design centerpieces, small gifts, and ornaments that match your holiday style.
With the right setup and simple ideas, you can decorate your home with pieces you made yourself and display them in ways that feel clean and intentional.
Choosing the Right Mason Jars and Craft Supplies
The jars and materials you choose shape the final look and function of your project. Focus on size, lid style, and quality supplies so your DIY mason jar decor looks clean and lasts through the season.
Selecting Mason Jar Sizes and Shapes
Start with the right jar size for your design. Half-pint jars (8 oz) work well for ornaments, small snow globes, and place settings. Pint jars (16 oz) fit mini trees, candles, and layered fillers like cranberries or faux snow. Quart jars (32 oz) suit larger centerpieces and lanterns.
Wide-mouth jars make it easier to place figurines, greenery, or fairy lights inside. Regular-mouth jars create a more classic, narrow shape that works well for simple candle holders.
You can explore ideas and size uses in these mason jar Christmas crafts for gifts and decor to see how different jars change the final look.
Check your mason jar lids before you buy. Standard metal lids work for most mason jar crafts, but you can also find lids with cutouts for straws, lights, or ornaments. If you plan to hang jars, choose lids with secure screw bands and add strong twine for support.
Essential Craft Materials for Christmas Mason Jars
You need a small group of reliable supplies to complete most DIY mason jar projects. Focus on tools that help with painting, sealing, and decorating.
Core materials:
- Mason jars and mason jar lids
- Acrylic paint (red, green, white, metallic)
- Spray paint for frosted or matte finishes
- Mod Podge for sealing and glitter
- Twine or ribbon for hanging and accents
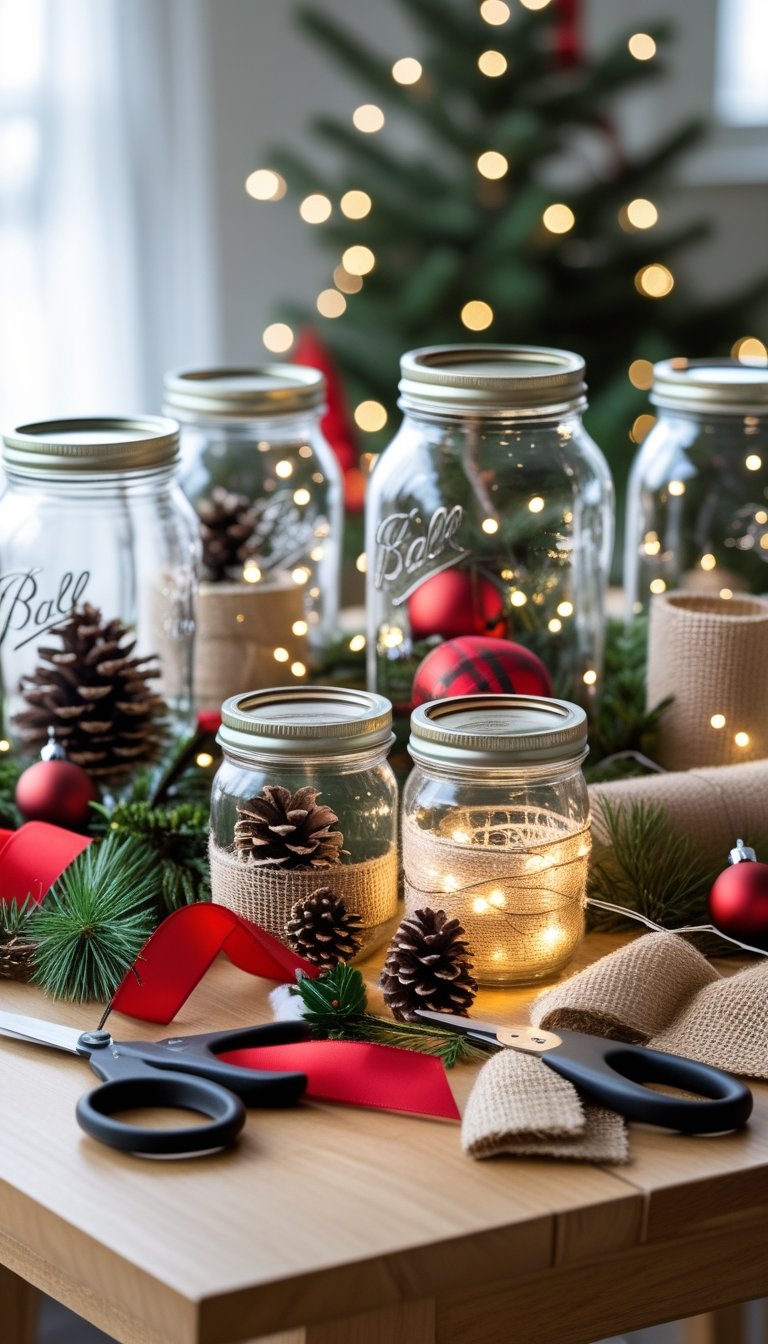
- Faux snow, mini trees, pinecones, or figurines
- Tea lights or battery fairy lights
Use acrylic paint for brush work like snowflakes or stripes. It dries fast and cleans up with water. Use spray paint to create even frosted finishes or solid base colors without brush marks.
Many popular projects such as snow globes, lanterns, and centerpieces appear in these mason jar Christmas crafts, which show how simple supplies can create different styles.
Preparing Jars for Decorating
Clean jars well before you decorate. Wash them with warm water and dish soap to remove dust or residue. Dry them fully to prevent paint from peeling.
Remove labels by soaking jars in warm, soapy water for 10 to 15 minutes. Peel off the paper and scrub away glue with a sponge. You can also wipe sticky spots with rubbing alcohol.
Lightly sand the outside surface if you plan to use spray paint or acrylic paint. This step helps the paint stick better. Wipe off sanding dust before you begin.
If you use Mod Podge for glitter or paper designs, apply a thin, even layer. Let each coat dry fully before adding another. Tight preparation keeps your mason jar crafts neat and durable throughout the holiday season.
Classic DIY Mason Jar Christmas Decor Ideas
You can turn simple jars into holiday decor with paint, frost, and glitter. These methods use low-cost supplies and give you full control over color and finish.
Painted Mason Jars for Holiday Themes
Painted mason jars let you match clear holiday themes like Santa, snowmen, or Christmas trees. You control the color, pattern, and texture.
Start with clean, dry jars. Wipe them with rubbing alcohol so the paint sticks well.
Use these common paint options:
- Acrylic paint for smooth color and easy cleanup
- Chalky painted mason jars for a matte, farmhouse look
- Spray paint for fast, even coverage
Apply thin coats and let each coat dry before adding another. This step prevents drips and streaks.
You can paint full characters like Santa or a snowman. For step-by-step inspiration, review these 45 DIY Christmas mason jar crafts that show painted holiday designs.
Seal your jar with a clear top coat if you plan to handle it often. Add ribbon, twine, or small ornaments around the lid to finish the look.
Glittered and Frosted Mason Jar Designs
A frosted mason jar or glitter mason jar creates soft holiday lighting. These styles work well for candle holders and centerpieces.
To frost a jar, brush on a thin layer of Mod Podge or spray it with frosted spray paint. Roll the jar in Epsom salt or fine glitter while the glue is wet for a snowy texture.
For a cleaner frosted look:
- Use frosted spray paint in light coats.
- Hold the can 8–12 inches away.
- Let the jar dry fully before adding details.
For more ideas, explore these mason jar Christmas decorations that show glitter and lighted designs.
Place a battery tea light inside to make the frost glow. Keep real candles away from loose glitter to reduce fire risk.
Creating Mason Jar Christmas Luminaries and Lanterns
You can turn simple jars into glowing decor with glue, paint, and safe lighting. Use candles or battery-powered lights to create steady light for tables, shelves, and porches.
Mason Jar Candle Holders and Votives
Start with a clean, dry jar. Remove labels and wipe the glass with rubbing alcohol so paint or glue sticks well.
To make a basic mason jar candle holder, brush a thin, even coat of craft glue on the outside. Roll the jar in Epsom salt or fine sugar for a frosted look. Let it dry fully before adding a tealight.
If you want a stronger design, use acrylic paint in red, green, or white. Apply paint with a sponge for light coverage. This helps the light glow through the glass.
Place a small mason jar votive or flameless tealight inside. For safety, many crafters choose flameless candles, as shown in this guide on how to make Christmas luminaries with mason jars.
Use real candles only if you keep the jar open at the top and never leave it unattended.
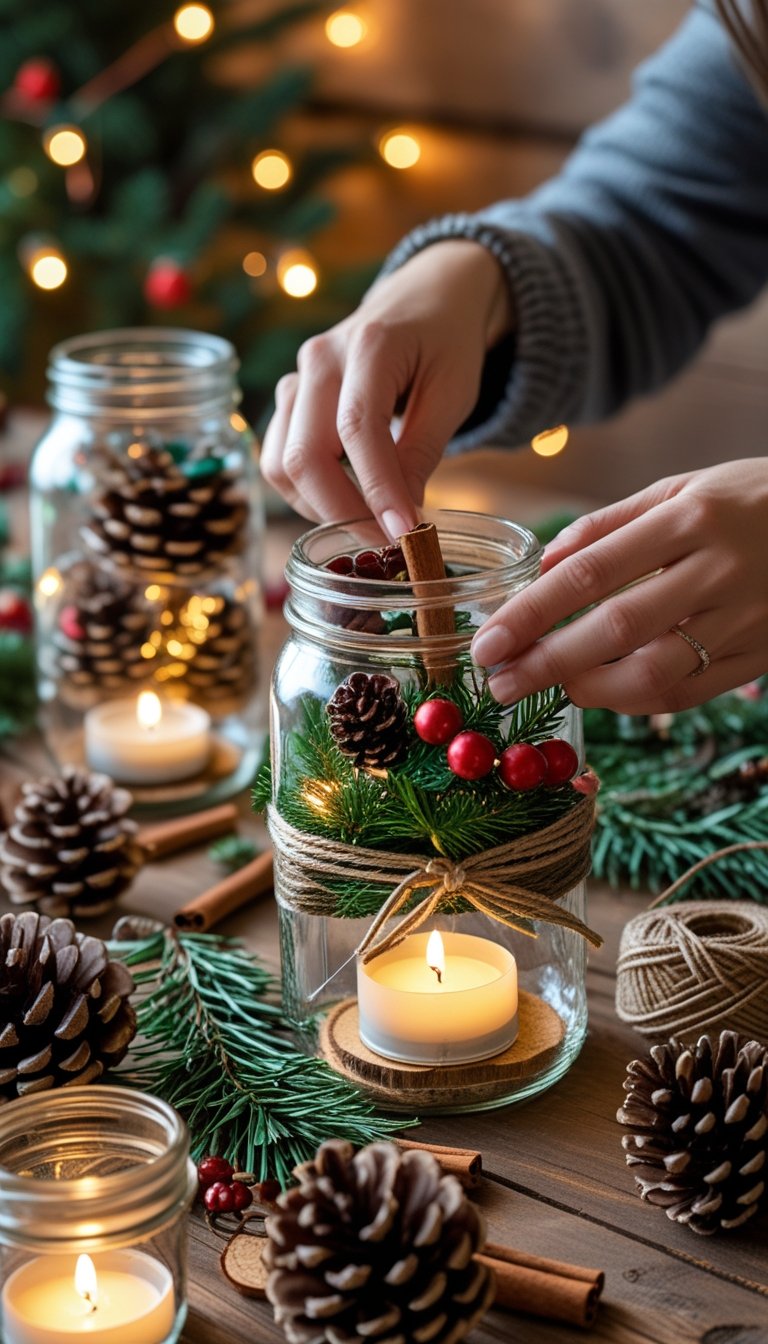
Magical Christmas Lantern Jars
You can create taller mason jar lanterns by adding handles. Wrap sturdy wire under the jar lip and twist it tight to form a loop.
Fill the jar with battery-powered fairy lights instead of a single candle. This spreads light across the whole jar and gives a soft glow. It also reduces fire risk.
To make your display stand out, layer materials inside the jar:
- Faux snow at the base
- Small pinecones or greenery
- Mini ornaments
Many crafters call these magical Christmas lanterns because the lights reflect off glass and glitter. For more ideas, review these DIY Christmas lanterns made from mason jars.
Place your finished Christmas mason jar luminaries along a walkway or on a mantel. Keep spacing even for a clean look.
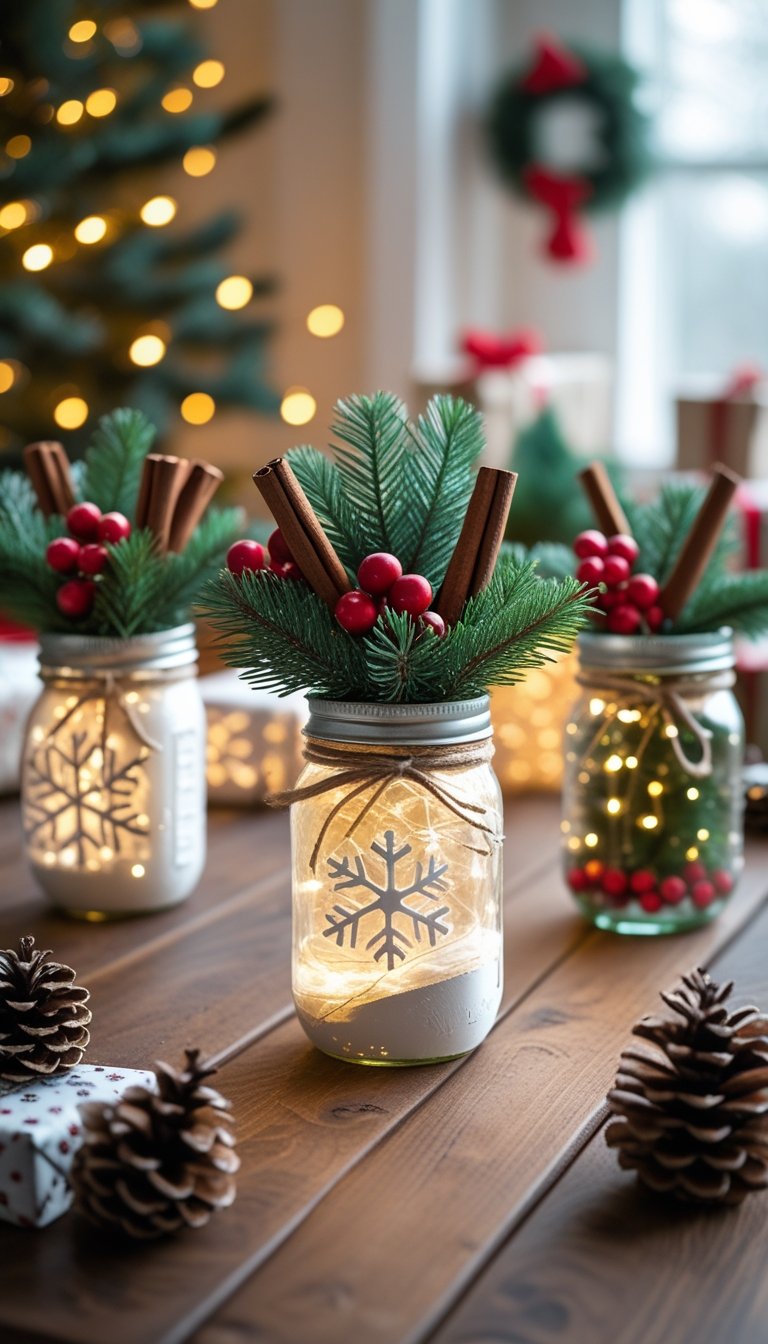
Snowflake and Stamped Luminary Ideas
You can add detail with paint and simple tools. A stamped snowflake mason jar adds pattern without complex drawing.
Cut a snowflake shape from craft foam and glue it to a small block. Dip it in white or metallic paint, then press it onto the jar. Repeat in a balanced pattern.
For a stamped snowflake mason jar luminary, use frosted spray paint first. After it dries, stamp snowflakes in a slightly darker shade for contrast. Let all paint cure before placing light inside.
You can also glue paper snowflakes to the outside and seal them with a thin coat of Mod Podge. For more frosted finishes, review these frosted mason jar luminaries with faux snow.
Use flameless lights to protect painted and sealed surfaces. This keeps your mason jar luminaries safe and long lasting.
Snow Globe and Illuminated Winter Scene Mason Jars
You can turn a simple jar into a moving snow scene or a glowing winter display. With the right supplies and sealing steps, your design stays secure and lasts through the season.
DIY Mason Jar Snow Globes
A mason jar snow globe creates a classic winter look with water and floating glitter. You attach small figurines to the inside of the lid so the scene appears when you flip the jar over.
Follow the basic steps from this guide on how to make Mason jar snow globes. You will need:
- Mason jar with lid
- Waterproof glue
- Mini trees or figurines
- Distilled water
- Glitter
- A few drops of glycerin
Glue the lid pieces together first to prevent leaks. Then secure your figurines to the inside of the lid. Let them dry overnight.
Fill the jar with distilled water, glitter, and glycerin. The glycerin slows the glitter so it falls like snow. Apply waterproof glue to the jar rim before sealing. This step helps your mason jar lid snow globe stay watertight.
Turn it upside down once dry, and shake gently to test the seal.
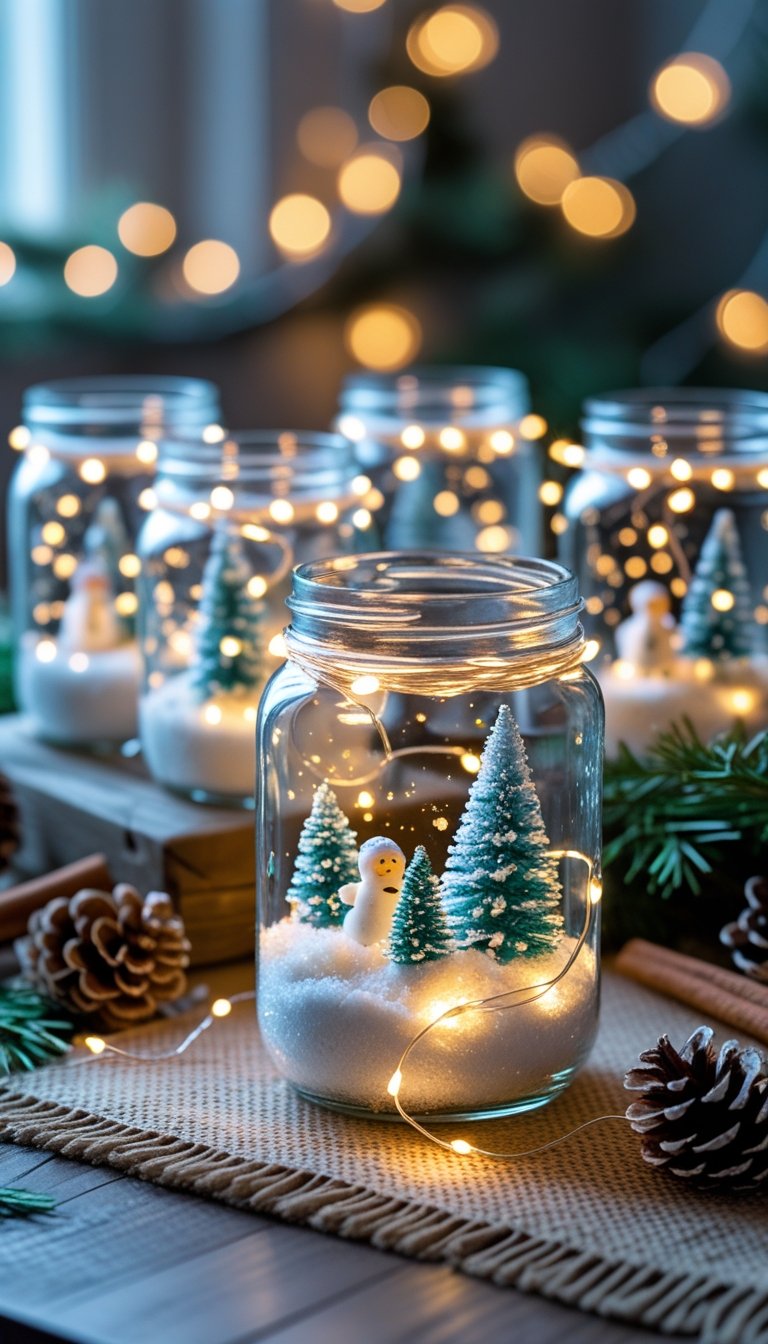
Illuminated Snow Scene Decor
An illuminated snow scene in a jar adds soft light to your display. Instead of shaking glitter, you build a small winter scene and light it from below.
Use a wide-mouth jar for more space. Place a layer of faux snow or batting inside. Add small houses, trees, or deer figures to create a clear layout.
Set an LED tea light under or inside the jar to make it glow. This tutorial for an illuminated snow scene in a jar shows how light brings depth to simple materials.
You can frost the outside with spray adhesive and fine glitter to create a snowy mason jar effect. Keep wiring simple and avoid real candles inside closed jars. LED lights stay cool and reduce risk.
Line several jars together to form winter wonderland mason jars across a mantel or shelf.
Dry Snow Globes for Mess-Free Crafting
Dry snow globes skip the water and use loose faux snow or glitter. This method works well for kids or for quick projects.
Attach figurines to the inside of the lid just like a water globe. Instead of filling with liquid, add:
- Artificial snow
- White glitter
- Small foam beads
Close the jar tightly and turn it over. The snow will fall when you shake it, but without leaks.
This approach works well if you want a lighter decoration or need to ship your mason jar snow globes as gifts. You also avoid glycerin and drying time.
Keep the lid tightly sealed, especially if you use very fine glitter. A small bead of glue around the rim adds extra security.
Festive Character Mason Jars: Snowmen, Santa, and More
You can turn a plain jar into a snowman, Santa, elf, or reindeer with simple paint and basic craft supplies. Focus on clear shapes, bold colors, and small details that make each character easy to recognize.
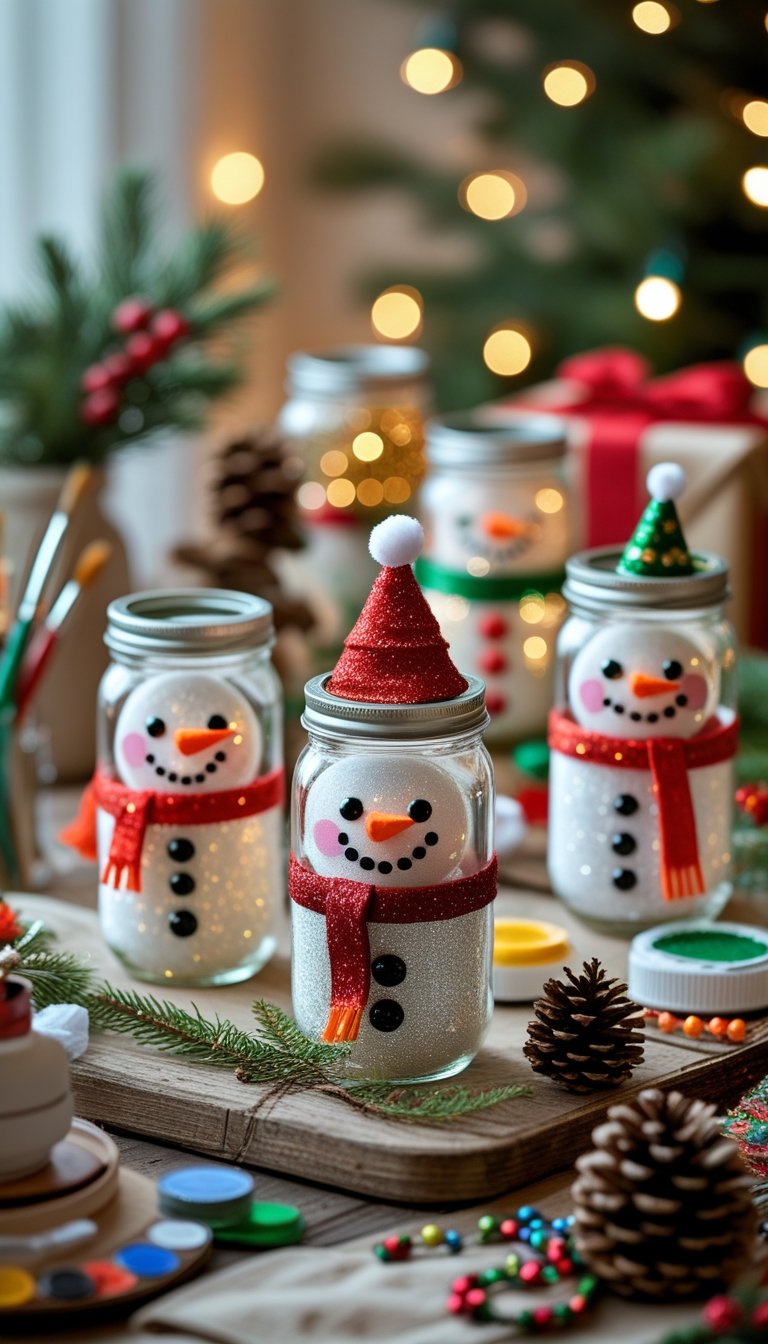
Creating Snowman Mason Jars
A snowman mason jar works well for decor or soft lighting. Paint the outside of the jar with white acrylic paint and let it dry fully before adding details.
Use black paint or small buttons for eyes and a dotted smile. Add an orange triangle nose with paint or foam paper. Tie a strip of fabric or ribbon around the neck to create a scarf.
To make a snowman mason jar luminary, place a battery tealight inside. The soft glow shines through thin paint and gives a winter look. For more ideas, review these mason jar snowman ideas that show how small items like buttons and ribbon add character.
You can also create a mason jar lid snowman by stacking lids and gluing them together. Paint them white and draw a tiny face for a simple ornament.
If you want more inspiration, explore these DIY snowman mason jar craft ideas that show beginner-friendly steps.
Santa and Elf Mason Jar Designs
A santa mason jar uses bold red paint and strong contrast. Paint the jar red, then add a black strip around the center for a belt. Glue on a gold square buckle to finish a classic santa belt jar look.
For a santa painted mason jar, add white trim around the top and bottom using cotton or thick paint. Draw simple eyes and a beard shape on the front. Keep lines clean and centered so the face looks balanced.
An elf mason jar uses green paint as the base. Add a black belt and small gold buckle like Santa’s, but use bright buttons or zigzag trim to create a playful style. Fill the jar with wrapped candy or small gifts.
You can find more variations in these Christmas mason jar crafts and ideas that feature painted jars and lighted designs.
Reindeer and Holiday-Themed Characters
A reindeer mason jar stands out with simple brown paint and bold features. Paint the jar light or dark brown. Add large white circles for eyes and a red pom-pom nose for a Rudolph look.
Create antlers from brown pipe cleaners and attach them under the lid band. This keeps the design stable and easy to remove for storage.
You can also try other holiday faces like penguins or gingerbread characters. Use the same base steps: solid paint color, clear facial shapes, and a few raised details.
For more creative options, review these DIY Christmas mason jar ideas that show how to add lights, greenery, and small accents to character jars.
Mason Jar Christmas Centerpieces, Vases, and Gifts
You can turn simple jars into eye-catching table decor and useful holiday gifts. With a few supplies, you create centerpieces, themed arrangements, and practical treat jars that match your style and budget.
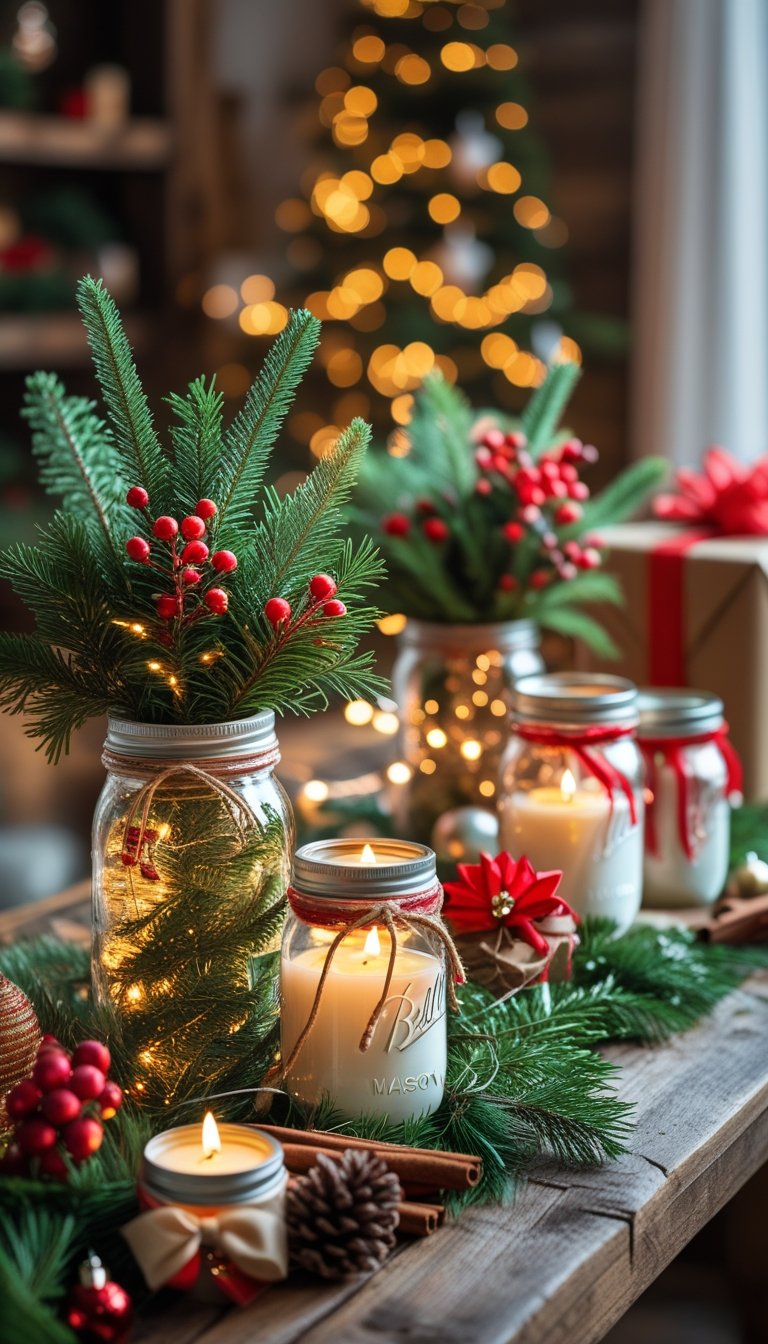
Creating Mason Jar Centerpieces for Tables
A mason jar centerpiece works well on dining tables, coffee tables, and entry consoles. You can keep it simple or build a layered look with greenery, lights, and ribbon.
Start with a clean jar. Then choose one of these base styles:
- Clear jar with greenery – Add fresh pine branches, holly, or faux cedar.
- Painted jar – Use white, red, or metallic paint on the inside.
- Glittered mason jar vases – Brush glue on the outside and coat with fine glitter for a subtle shine.
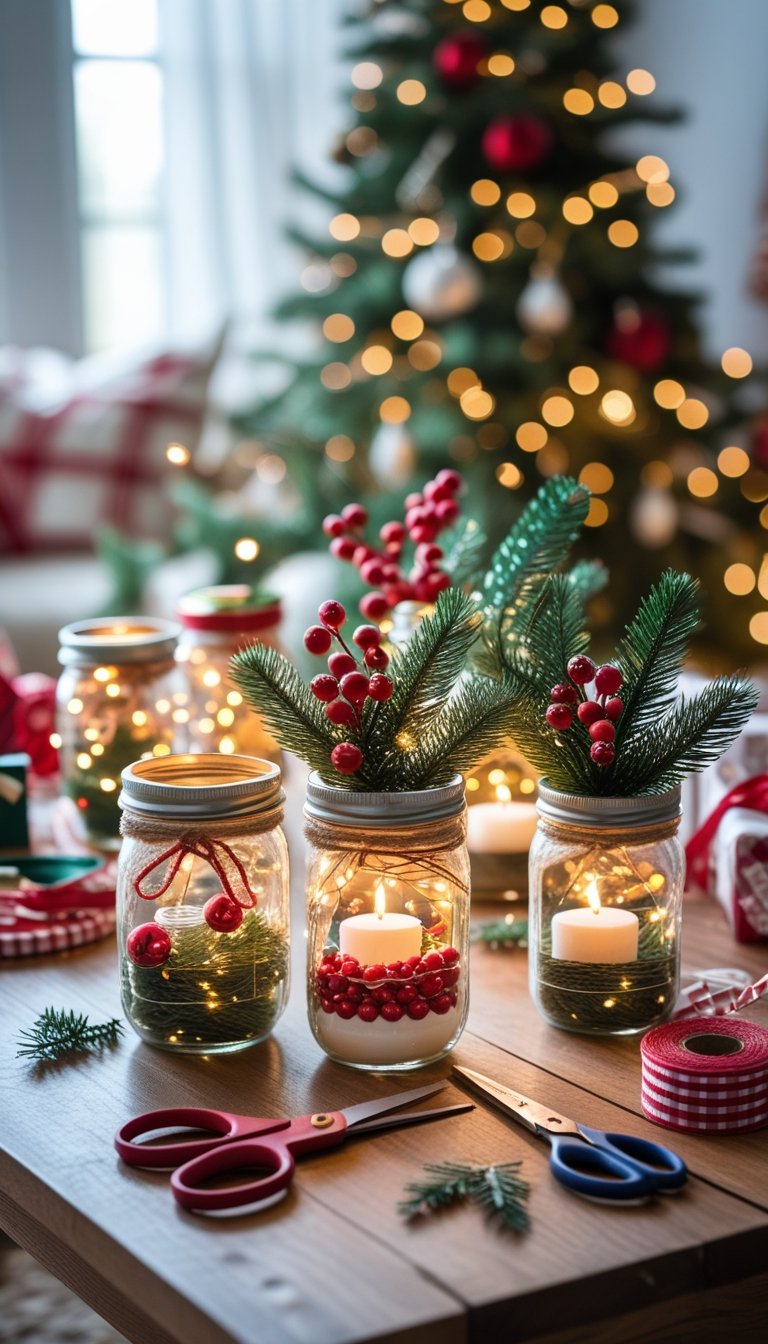
Place a votive candle, battery tea light, or fairy lights inside for a soft glow. For larger christmas centerpieces, group three jars of different heights on a tray. Tie burlap, plaid ribbon, or twine around the neck to finish the look.
If you want more ideas for themed table setups, review these Christmas mason jar centerpiece ideas to see how different colors and fillers change the mood of your display.
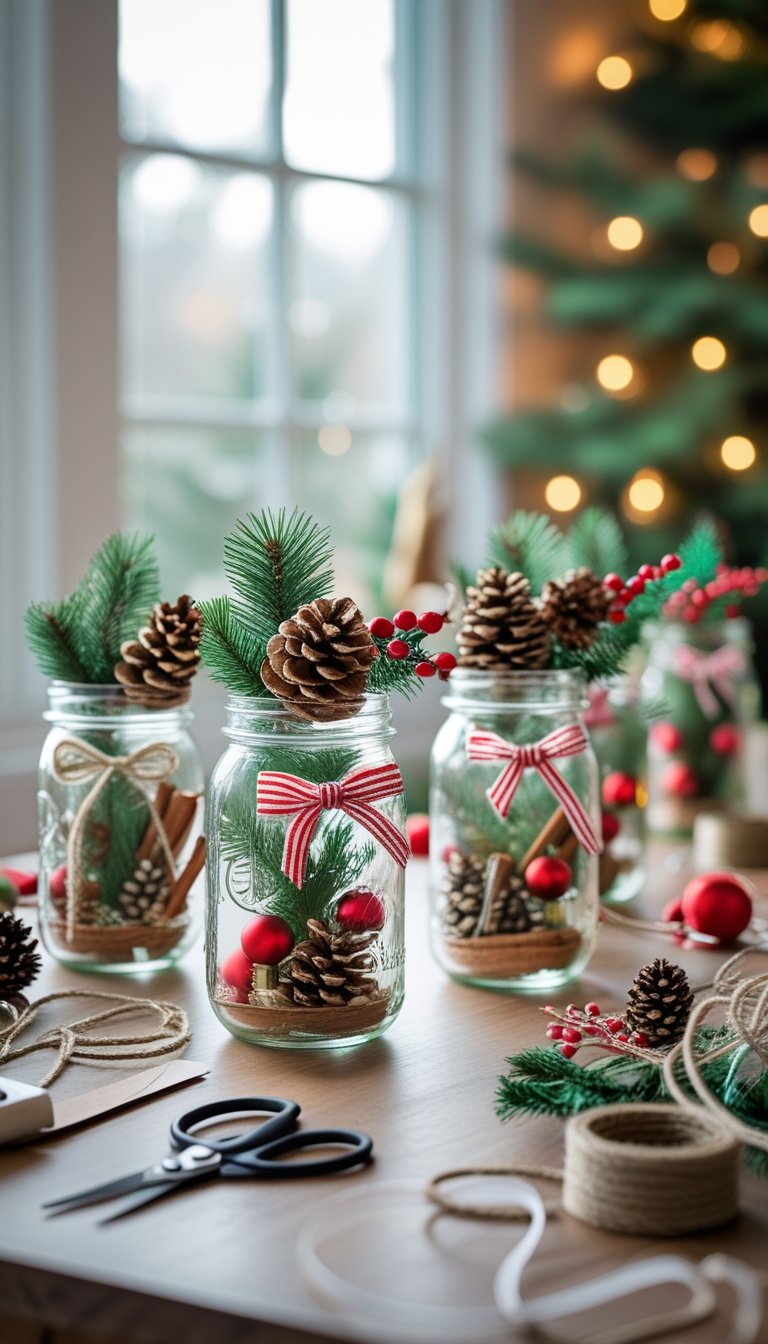
Christmas Tree Mason Jar Arrangements
A christmas tree mason jar adds height and shape to your decor. You can create a single focal piece or line several jars down the center of a table.
To make a mason jar christmas tree arrangement:
- Fill the jar halfway with faux snow, Epsom salt, or white sand.
- Insert a small bottle brush tree or mini artificial pine.
- Add tiny ornaments or red berries around the base.
For a more detailed design, paint a tree silhouette on the outside of the jar and place a candle inside. This creates a soft outline when lit. You can also follow a guided craft like this Christmas Tree Mason Jar Votive tutorial to use stencils and simple supplies.
Keep colors consistent. Use gold and white for a modern look or red and green for a traditional style.
Mason Jar Gifts and Treat Jars
Mason jar gifts give you a practical and personal option for the holidays. You control the contents and the cost.
Popular christmas mason jar gifts include:
- Hot chocolate mix layered with marshmallows and chocolate chips
- Sugar cookie mix with baking instructions attached
- Spice rubs for grilling or roasting
- Spa kits with nail polish, lotion, and small tools
Layer dry ingredients neatly so the jar looks clean and organized. Attach a tag with clear instructions. Wrap the lid with fabric or tie ribbon around the neck for a finished look.
If you want more inspiration for christmas treat jars and handmade gifts, browse these easy DIY Christmas Mason jars for gifts and decorations.
Ornament and Accessory Mason Jar Crafts
You can turn simple jar lids and basic add-ons into detailed Christmas pieces. Focus on secure assembly, balanced weight, and clean finishes so your decorations last all season.
Mason Jar Lid Ornaments and Wreaths
A mason jar lid ornament works best when you use only the flat lid insert, not the full jar. The insert is lighter and hangs better on a tree branch.
To make classic mason jar lid ornaments, place fabric, wrapping paper, or sheet music behind the insert. Secure it with the metal ring. Add twine or ribbon for hanging. This method keeps the design tight and smooth.
You can also create small wreaths using jar rings. Wrap the ring with:
- Green yarn
- Faux pine garland
- Red ribbon
Glue on small beads or buttons for detail.
For a playful look, make a mason jar lid snowman. Paint the insert white. Add black dots for eyes and an orange triangle for the nose. Glue on a ribbon scarf at the base.
If you want sparkle, try glitter jar ornaments. Brush glue onto the insert, sprinkle fine glitter, and seal with clear spray. For more inspiration, review these Mason jar lid wreath ornaments.
Personalized Jar Accessories and Add-ons
Accessories turn a plain jar into a finished gift or display piece. You can add simple items that match your theme without adding too much weight.
Common add-ons include:
- Twine or baker’s string
- Small gift tags
- Mini ornaments
- Faux greenery sprigs
Tie tags around the neck of the jar. Write names, short notes, or dates to personalize each piece.
You can also attach small objects to the lid. For example, glue a tiny tree, bell, or figurine on top to create dimension. Many crafters use ideas from collections like these DIY Mason Jar Ornaments to plan custom details.
Keep balance in mind. Heavy decorations can tip small jars.
Choose materials that match your color scheme. Red and green feel traditional. White, silver, and clear accents create a simple winter look.
Tips for Displaying and Using Your Mason Jar Christmas Decor
Place your jars with purpose so they stand out and stay safe. Use smart spacing, strong hardware, and proper lighting to get the best results from your Christmas mason jars.
Arranging Mason Jars for Maximum Impact
Group jars in odd numbers such as three or five. This creates balance and keeps the display from looking flat. Vary the height by using cake stands, wood blocks, or stacked books under a table runner.
Mix different styles of Christmas mason jars. For example:
- One jar with fake snow and a mini tree
- One jar filled with red ornaments
- One jar with fairy lights
Keep colors consistent. Stick to one theme like red and white, gold and green, or neutral farmhouse tones.
Place jars where people naturally look. Center them on a dining table, line them across a mantel, or use them as a kitchen island centerpiece. If you want wall decor, install a mason jar sconce to frame a mirror or window.
Leave space between each jar. Crowding reduces the visual impact and makes cleaning harder.
Hanging and Outdoor Mason Jar Lanterns
Turn your jars into hanging holiday lanterns to add light at eye level. Wrap strong wire tightly under the jar rim and twist it into a secure handle. Test the handle before hanging.
Hang jars from:
- Shepherd’s hooks along a walkway
- Porch beams with heavy-duty hooks
- Tree branches that can support the weight
Use LED tealights or battery string lights for outdoor displays. They resist wind better than open flames and reduce fire risk.
For wall lighting, mount a mason jar sconce on wood backing and secure it to studs or anchors. Keep the jar upright and stable.
If you display jars outside, protect them from moisture. Use jars with tight lids, and avoid placing electrical parts where rain can collect.
Safety Tips for Candle and Lighted Jars
Choose the right light source. LED candles and battery fairy lights work best for most indoor setups.
If you use real candles, follow these rules:
- Use wide-mouth jars for better airflow.
- Keep the flame below the jar rim.
- Never leave the candle unattended.
Place jars on heat-safe surfaces like stone, tile, or thick wood. Avoid thin shelves or fabric-covered tables.
Check cords and battery packs before use. Do not overload outlets, and keep wires away from water.
Keep jars out of reach of children and pets. Stable placement prevents tipping and broken glass.