
How to Make DIY Halloween Pumpkin Wreath: Unique Craft Ideas & Tips
You can make a DIY Halloween pumpkin wreath by attaching mesh, ribbon, or fabric to a pumpkin-shaped frame and decorating it with faux pumpkins, leaves, and Halloween accents. You create a DIY Halloween pumpkin wreath by securing decorative materials to a pumpkin wreath form and layering themed embellishments for a full, festive look. With the right supplies and a clear plan, you can finish this project in about an hour.
You will start by choosing your base and gathering simple craft materials. After you prepare the frame, you will shape and attach your mesh or ribbon to build a full pumpkin form. From there, you will add color, texture, and themed details that match your Halloween style.
You will also explore creative variations, from classic orange pumpkins to spooky designs with black accents and themed decor. With a few final touches and the right way to hang it, your wreath will stand out on any front door this Halloween.
Essential Supplies for DIY Halloween Pumpkin Wreaths
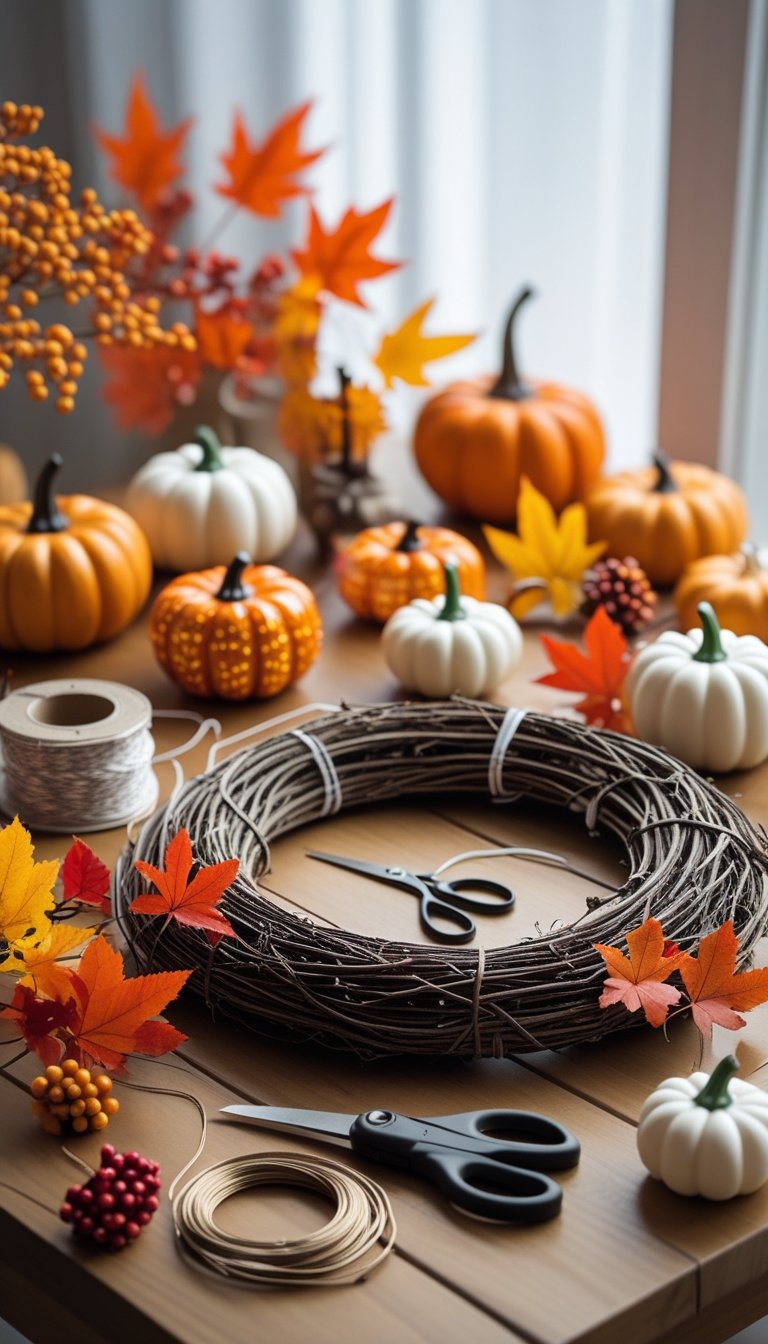
You need a sturdy base, reliable tools, and decorations that match your Halloween theme. The right supplies help your pumpkin wreath hold its shape, stay secure, and look balanced on your door.
Choosing the Right Wreath Base
Your wreath base shapes the entire project. Choose one that supports the weight of your decorations and fits the look you want.
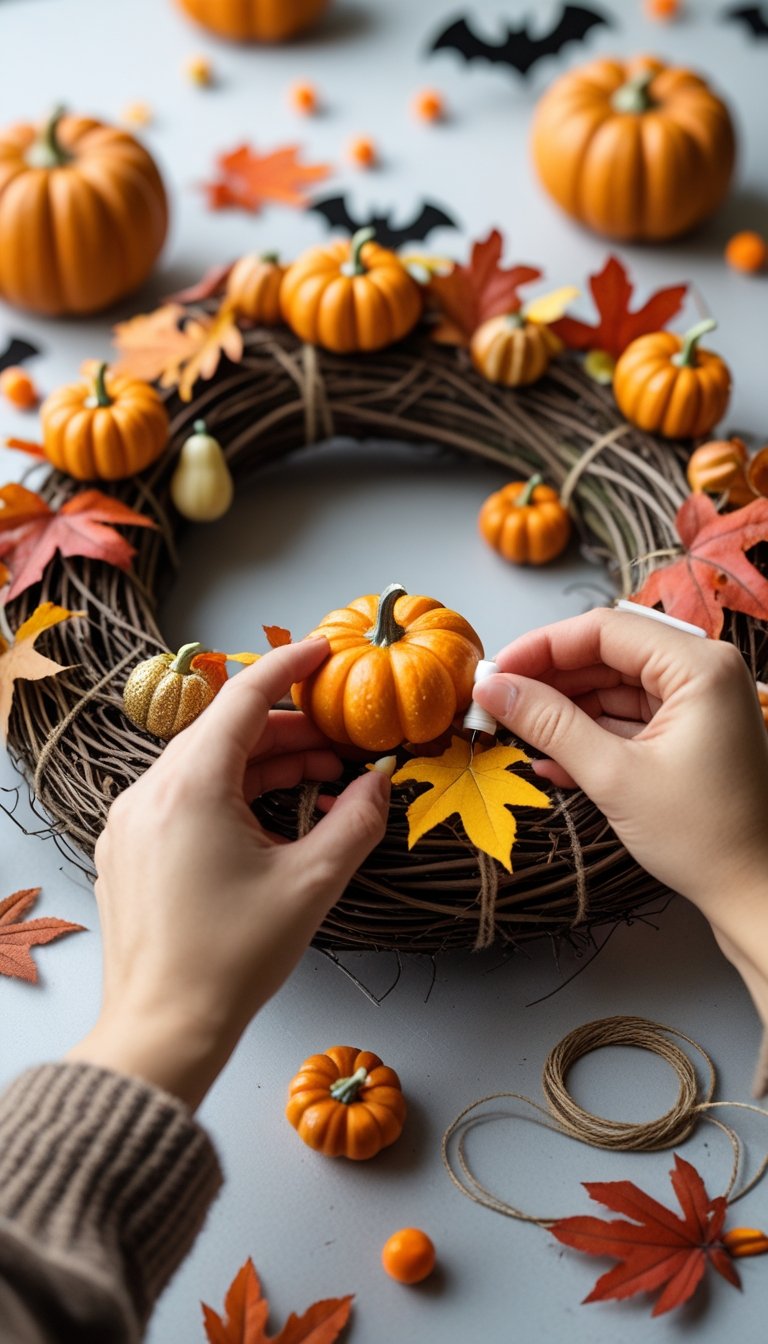
A grapevine wreath gives you a rustic style. The natural twigs add texture, and you can tuck stems and florals into the branches without much glue. A grapevine wreath base works well for lightweight faux pumpkins and fall leaves.
A foam wreath form offers a smooth and solid surface. You can push in floral pins or secure items with hot glue. Foam works best if you want full coverage with mesh, ribbon, or fabric.
A wire wreath form or wire wreath frame is strong and lightweight. It suits mesh designs and layered ribbon styles. Many crafters use a pumpkin-shaped frame, like those shown in this DIY pumpkin wreath tutorial using a Dollar Tree pumpkin frame. Wire frames also help you build a defined pumpkin shape for your DIY Halloween wreath.
Tools and Adhesives Needed
You need tools that attach decorations firmly and safely. Weak adhesives lead to falling pumpkins and loose ribbon.
A hot glue gun with strong hot glue handles most faux decorations. Use it to secure small pumpkins, bows, and plastic accents. Press each item in place for several seconds so it bonds well.
Keep extra glue sticks nearby. Thick decorations require more glue than you expect.
Use floral pins to anchor ribbon or fabric into a foam wreath form. Push them in at an angle for better grip. For wire wreath frames, use zip ties or floral wire to tie mesh and greenery tightly to the frame.
Sharp scissors or wire cutters also matter. Clean cuts help your wreath look neat and professional.
Recommended Decorative Elements
Choose decorations that clearly say Halloween. Focus on color, texture, and balance.
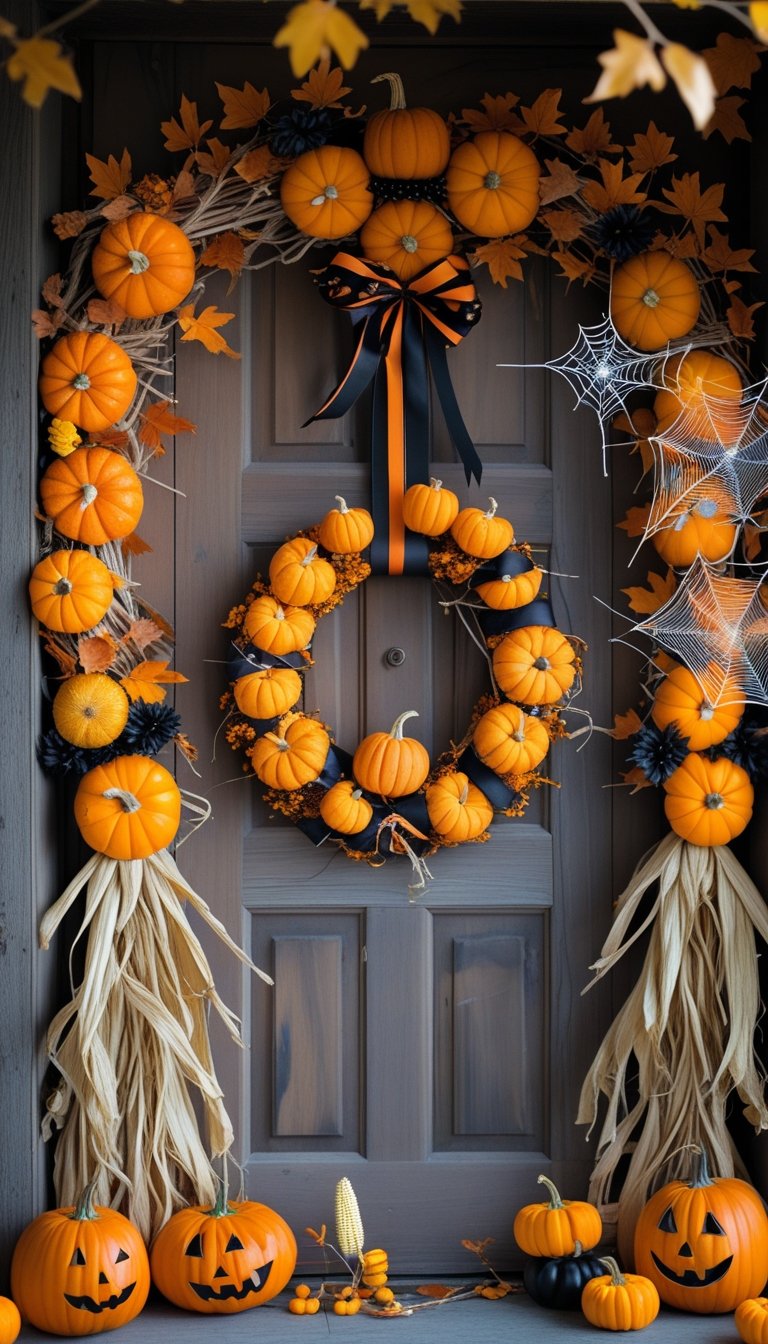
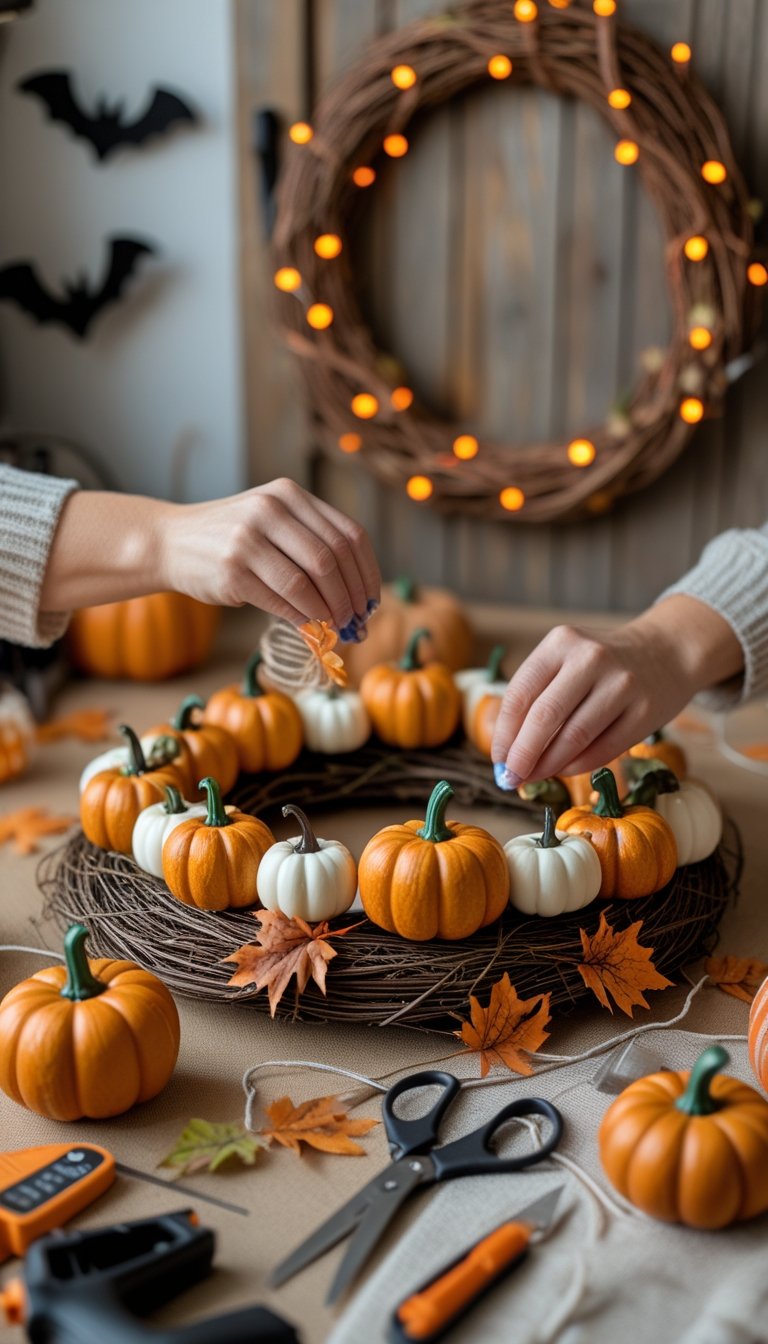
Start with faux mini pumpkins in orange, white, or black. Faux pieces last longer outdoors than real pumpkins. Arrange them evenly so one side does not feel heavy.
Add mesh or ribbon for volume. Many crafters use poly burlap mesh on pumpkin-shaped frames, as shown in this pumpkin mesh wreath DIY guide. Mesh creates a full pumpkin look without adding much weight.
Layer in fall leaves, small branches, or black glitter stems. You can also add bats, spiders, or a simple bow at the top. Keep spacing even and avoid crowding the center so your pumpkin wreath keeps a clear shape.
Preparing the Pumpkin Wreath Base
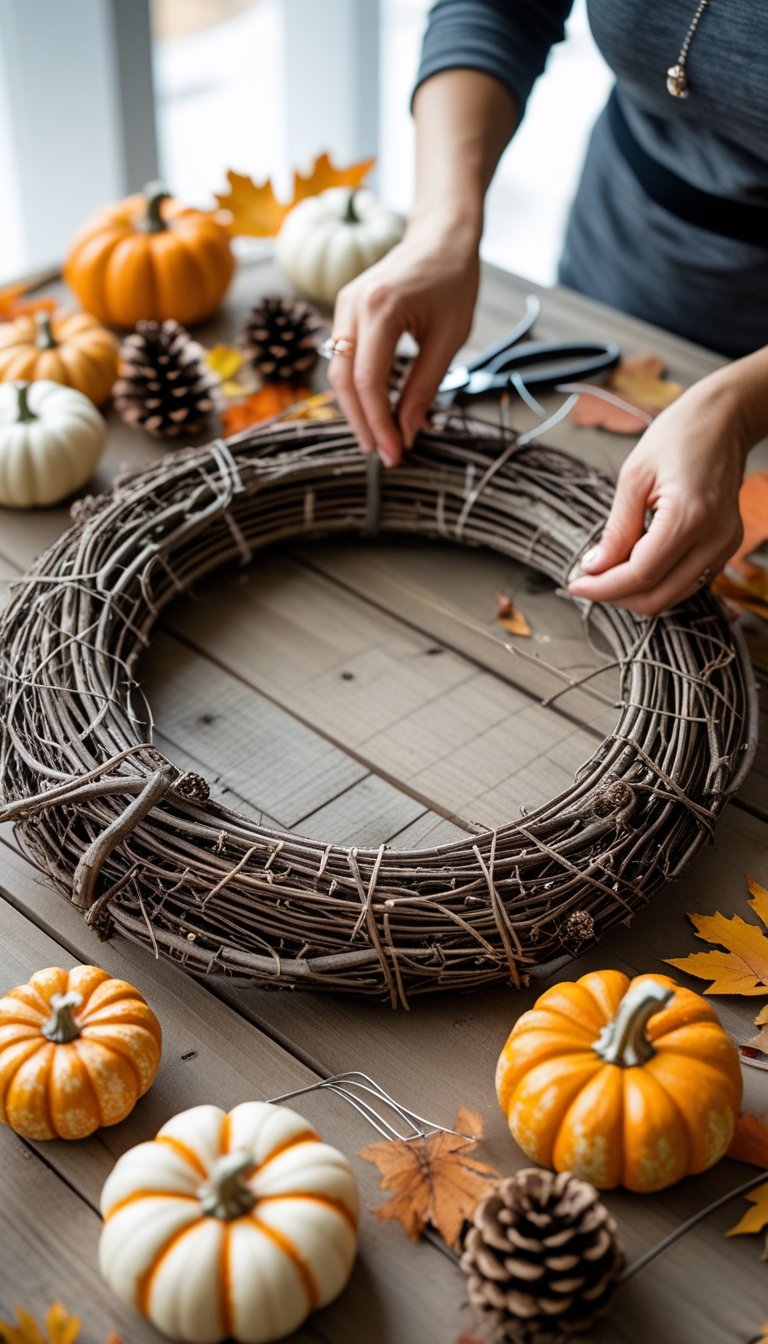
Start with a strong base so your pumpkin wreath holds its shape and decorations stay secure. Clean the form, check its structure, and plan where each pumpkin will sit before you attach anything.
Working with Grapevine Wreaths
A grapevine wreath gives your pumpkin wreath a natural and textured look. Before you decorate, shake it lightly to remove loose twigs and dust. Trim any sharp or broken pieces with scissors.
Set the wreath on a flat surface and decide where the top will be. This helps you balance the pumpkins and other decor. Many guides, such as this 10-step pumpkin wreath guide, suggest attaching mini pumpkins around the outer edge first to create a clear shape.
Use floral wire to secure each pumpkin. Wrap the wire tightly around the stem or base, then twist it into the grapevine branches. Avoid relying only on hot glue, especially for heavier pieces.
Keep spacing even. Step back and check that your pumpkin wreath looks balanced before moving on.
Using Foam and Wire Wreath Forms
A foam wreath form creates a smooth and solid base. If the foam is bright green or white, wrap it with ribbon or mesh before adding pumpkins. This prevents gaps from showing through.
Press decorations directly into the foam with wire picks, then secure them with hot glue. Foam holds lightweight pumpkins well, but large items may need extra support.
A wire wreath frame works best for mesh or ribbon pumpkin wreath designs. You can weave deco mesh through the frame or attach pumpkins with zip ties or floral wire. For inspiration, review this pumpkin deco mesh wreath tutorial.
Check that each piece sits tight against the frame. Tug gently on every pumpkin to test its hold before you continue decorating.
Step-by-Step Guide to Crafting a Classic Halloween Pumpkin Wreath
Build your pumpkin wreath in clear stages. Cover the base, attach your pumpkins and leaves with care, then finish with a strong hanger that supports the weight.
Wrapping and Covering the Wreath Form
Start with a 14–18 inch foam or grapevine wreath form. If you want a darker look, spray paint it black and let it dry fully before you add anything.
Wrap the form with orange mesh, burlap, or wide ribbon. Pull the material tight as you go so the base does not sag once you hang it. Secure the ends with hot glue on the back side.
For extra texture, layer folded fabric strips or even cupcake liners to create a cupcake liner wreath effect. This works well if you want a fuller mini pumpkin wreath with more volume.
Keep the surface even. Large bumps make it harder to glue pumpkins flat.
Tip: Work in small sections and press firmly for 10–15 seconds after each glue line.
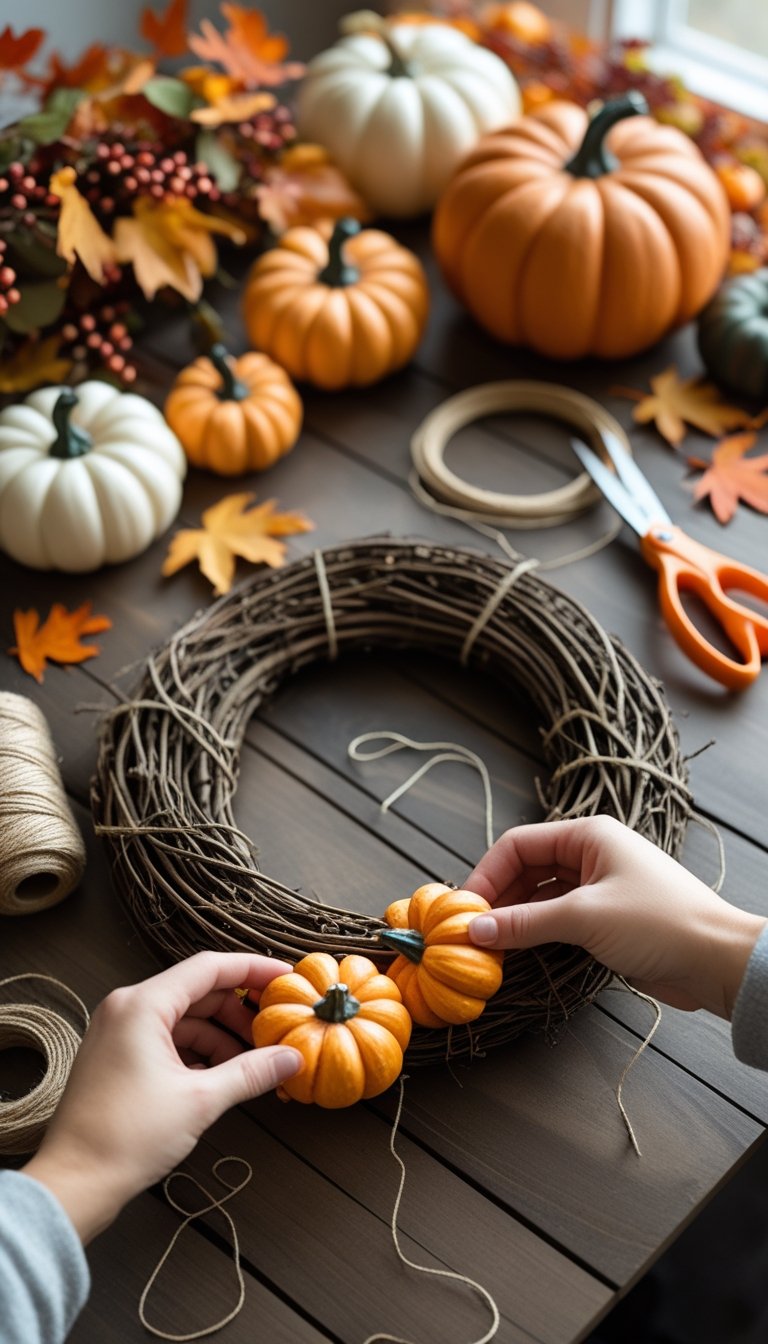
Securing Mini Pumpkins and Leaves
Lay out your design before you glue anything. Place your mini pumpkins in a loose cluster at the bottom or on one side for a balanced look.
Attach the largest pumpkins first. Apply a generous line of hot glue to the back and press each pumpkin into the base. Hold it in place until the glue cools.
Use floral pins for extra support, especially if your pumpkins feel heavy. Push the pins through the pumpkin base and into the foam form at an angle.
Fill gaps with fall leaves in orange, red, or black. Tuck them under the pumpkins and secure them with small dots of glue. Spread them evenly so your DIY Halloween wreath looks full but not crowded.
Check the wreath from a few feet away. Adjust spacing before the glue fully sets.
Adding a Bow or Ribbon Hanger
Choose a thick black ribbon or burlap strip that can support the wreath’s weight. Cut a piece about 24–30 inches long.
Loop it through the top of the wreath form and knot it tightly at the back. If you prefer a bow, tie one at the top and secure the center with hot glue.
Reinforce the hanger with extra glue where the ribbon touches the form. Press firmly and let it cool.
Hang the wreath on a sturdy hook. Make sure the pumpkins sit upright and the bow stays centered. Adjust the ribbon length if the wreath hangs too high or too low on your door.
Creative Halloween Pumpkin Wreath Variations
You can change the look of your pumpkin wreath by swapping materials and adding themed details. Simple choices like burlap, ribbon, glitter, or fabric scraps shape the final style and help you match your door to the rest of your Halloween decor.
Rustic Burlap Pumpkin Wreath
You can build a rustic burlap pumpkin wreath with a wire pumpkin frame or a grapevine base. Wrap wide burlap ribbon around the frame and secure it with hot glue or floral wire. Keep the folds loose so the wreath looks full.
Add small accents that fit a harvest wreath theme. Try:
- Faux fall leaves
- Mini pinecones
- Small foam pumpkins
- Neutral plaid ribbon
You can attach a small black cat wreath accent or a flat wooden cat shape to one side. This keeps the design Halloween-ready without losing the rustic look.
For a stronger Halloween feel, tuck in a small witch hat wreath detail near the top curve of the pumpkin. Use muted colors like tan, brown, dark orange, and black. Avoid bright tones so the burlap texture stays the focus.
Glitter and Fabric Scrap Pumpkin Wreaths
A glitter pumpkin wreath stands out on a plain door. Start with a foam or wire pumpkin form. Cover sections with orange mesh or fabric, then brush on craft glue and sprinkle fine glitter.
Work in small areas so the glitter sticks well. Shake off extra glitter before moving to the next section.
You can mix in strips of fabric to create a ribbon wreath effect. Cut cotton or flannel into 1-inch strips and tie them around the frame. Use black, purple, and orange for a bold look.
For a playful style, shape the design into a cat wreath by adding felt ears and a curved tail. You can also turn the top of the pumpkin into a witch hat wreath by attaching black felt and a small buckle detail.
Keep the base secure and balanced. Heavy glitter and fabric can shift the shape if you do not spread them evenly across the frame.
Spooky and Themed DIY Halloween Wreath Ideas
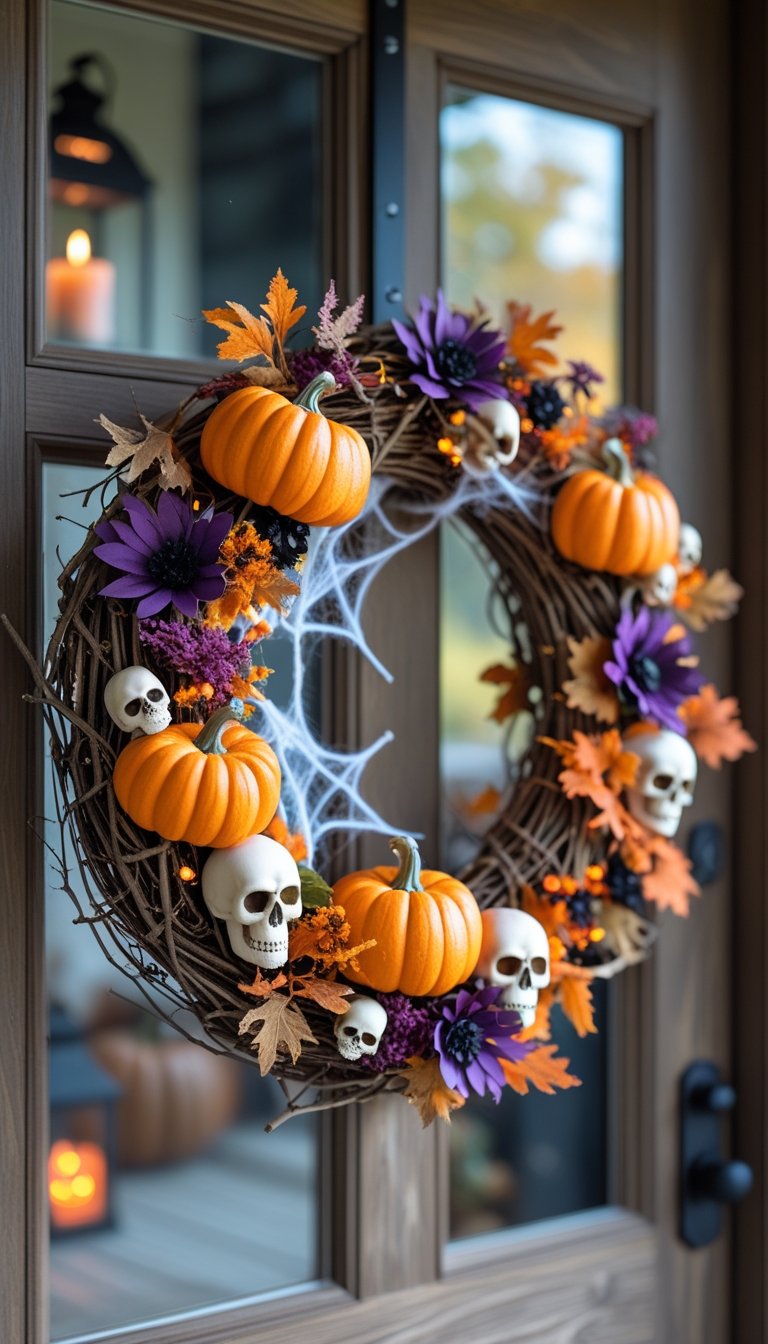
You can turn a simple pumpkin wreath into a bold Halloween statement with focused details and clear color choices. Use themed accents like spiders, skulls, ghosts, candy corn, or crows to match the exact mood you want.
Spider Web Pumpkin Wreath
Create a spooky spider web wreath by wrapping white yarn or thin rope across the center of your pumpkin base. Crisscross the strands in even sections, then tie them tightly at the back to hold tension. This simple spider web wreath design works best on an open grapevine or wire pumpkin frame.
Add faux spiders in different sizes for depth. Place one large spider near the center and smaller ones along the web lines. You can also tuck in a few plastic bugs around the outer edge to make the wreath feel active without clutter.
If you want more detail, spray the web lightly with glow-in-the-dark paint. Keep the pumpkin frame black or deep orange so the web stands out clearly.
Skeleton and Skull Accents
A skeleton wreath looks strong and clean when you limit your colors to black, white, and muted orange. Attach small skulls evenly around the pumpkin shape. Space them about two inches apart so the design feels balanced.
For a bold focal point, add two skeleton hands reaching toward the center. Angle them slightly inward so they frame a small sign or bow. A skeleton hands wreath works best when the hands overlap the pumpkin edge for a layered effect.
You can also cluster mini skulls at the bottom to create a skull wreath look. Secure each piece with hot glue and reinforce heavier items with floral wire to prevent sagging.
Ghost and Candy Corn Wreaths
A ghost wreath pairs well with soft white fabric and light orange pumpkins. Cut simple ghost shapes from felt and glue them around the wreath. Add small black eyes and mouths for clear expressions.
For a sweeter theme, turn your pumpkin base into a candy corn wreath. Paint sections in white, orange, and yellow bands. Keep the lines straight and let each layer dry fully before adding the next.
You can also glue wrapped candies around the frame to create a small candy wreath accent. Seal loose wrappers with a dot of hot glue so wind does not shift them.
If you want more ideas for creative front door styles, browse these DIY Halloween wreath ideas to compare color layouts and material choices.
Crow and Black Rose Pumpkin Wreaths
A crow wreath gives your pumpkin a darker tone without making it busy. Attach one large black crow near the top or side of the pumpkin frame. Let it face inward toward the center to guide the eye.
Add clusters of deep red or dark purple flowers for contrast. If you prefer a gothic look, build a black rose wreath effect by covering one side of the pumpkin with black silk roses. Keep the other side simple with exposed twigs or mesh.
You can tuck in thin black branches or matte leaves behind the roses. For more bold door designs, review these spooky Halloween wreath ideas and adapt the darker color palettes to your pumpkin base.
Finishing Touches and Hanging Your Halloween Pumpkin Wreath
Strong attachments and smart placement keep your wreath looking neat all season. Focus on firm bonds, balanced design, and safe hanging methods.
Securing Decorative Elements
Check every pumpkin, ribbon, and accent before you hang your wreath. If you use hot glue, apply a thick bead at the base of each item and press it down for 10–15 seconds. For heavier pieces, add glue at two contact points.
Use zip ties or floral wire for large picks or plastic pumpkins. Thread the wire through the wreath form so the weight does not rely on glue alone. This step prevents sagging over time.
Add a black ribbon bow to give your design a clean Halloween look. Tie it tightly and secure the center with wire or a zip tie before gluing it in place.
If you want more design ideas, review different styles shown in this Halloween pumpkin wreath tutorial to see how layered mesh and ribbon stay secure. Study how decorations sit evenly around the frame. Balanced spacing keeps your DIY Halloween wreath from looking crowded.
Tips for Display and Storage
Hang your wreath with a sturdy metal wreath hanger or a heavy-duty adhesive hook. Make sure the hook supports the full weight, especially if you used mesh and multiple pumpkins.
Place your wreath on a covered porch when possible. Direct rain and strong sun can weaken glue and fade colors on many Halloween wreaths.
If your design includes lights, use battery packs and secure them to the back of the frame with zip ties. Keep wires flat so the wreath hangs straight.
When the season ends, store the wreath in a large plastic bin or a wreath storage bag. Lay it flat to protect bows and raised accents. You can explore more creative Halloween wreath ideas, such as glowing designs, in this DIY pumpkin wreath with a spooky glow example and plan how you will store similar features safely.


